
If you want to learn how to change the iPhone 5 battery, below we are going to tell you step by step how you should proceed to do it safely and, of course, totally efficiently.
Precautions before changing the battery to the iPhone 5
First of all, it is important that we keep in mind that Apple does not recommend that the user change the battery of their device, but rather advises that we do it through its official technical service. On the one hand because it is the safest way to do it, and on the other because it is essential, according to the manufacturer, to only use original batteries, since otherwise they could cause a problem in the operation of our device.
Obviously here each one must decide what they consider most appropriate in their case, and of course, if the device is under warranty, what is clear is that it is better to send it to the technical service since they will take care of everything, but if it is already out of warranty, it is best that we analyze the costs and, in this case, request a quote to study what may be more worthwhile for us.
Steps to change the battery on the iPhone 5
The first thing we must keep in mind is that, although it is a fairly simple process, it is essential that we carry it out very carefully, since any mistake can cause us to spoil something or touch what we should not touch. However, as long as we are minimally handy and careful, you will see that it is really easy to do it.
It should be noted that we are going to need a iPhone repair kit, which has appropriate screwdrivers and in general all the tools that we will need to proceed with the greatest safety.
First of all we have to look at the two screws that are on both sides of the Lighting connector, which we must extract and store in a place where they will not be lost, since they are very small in size and we already know what they mean. It happens with these things.
Now we can remove the front panel for which we will have to lever while suctioning using the suction cup very carefully to prevent the cables on the top from being disconnected.
Once this is done, we now have to separate the cables from the motherboard, for which we only have to remove the two screws that are visible and then we remove the small plate.
The next step will be to disconnect the cables from the LCD, the camera and the digitizer using a small plastic lever that we will find in our kit, and now we can completely remove the front panel.
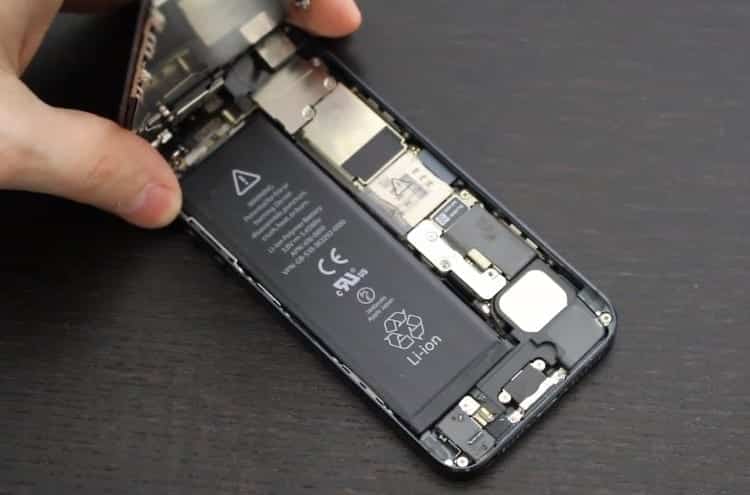
All we have to do is remove the three screws that join the battery to the motherboard and then we can remove the connector and the battery itself, so all we have to do is place the new battery as the old one was and we will now proceed in reverse. , that is, we put the three battery screws back, then we connect the cables from the camera, the digitizer and the LCD, then we put the two screws to join the cables to the motherboard, and we have nothing left but place the front so we can enjoy our phone again, but this time with a completely new battery so we will have recovered all the autonomy from when we bought the device.
As you can see, the process is very simple to carry out and we can do it in a few minutes, but it is important that you be patient and not rush to avoid damaging something and in the end the stuffing will be more expensive than the turkey. .
Industrial Engineering student and lover of writing and technology, for several years I have participated in various pages with the aim of always keeping myself informed of the latest trends and contributing my grain of sand in this immense dissemination network that we know as the Internet.

 – Access to Wi-Fi settings")

