
The possibility of configure the mouse pointer in Windows 10, a very simple process to carry out and that will allow you to better personalize your desktop if you are considering change the default Windows 10 pointer.

Change the pointer in Windows 10
To be able to change the pointer in Windows 10, the first thing we are going to do is go to the configuration section of our interface. There are different ways to access, and one of them is through the Windows 10 main bar finder. However, perhaps the easiest way is to click with the right mouse button on any free part of the desktop and then click again, although this time with the left mouse button, on the “Customize now".
This will open a window and on the left you will be able to see several options from which we can choose. In our case what we want is to change the mouse pointer in Windows 10, which means that we will have to click on “Themes” and we will be presented with a new window with the options to choose from.
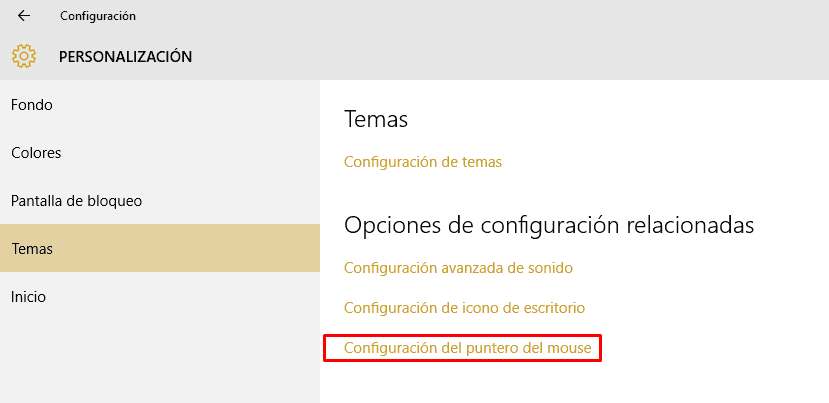
What we will click on “Mouse pointer settings” and this will result in a new window opening:
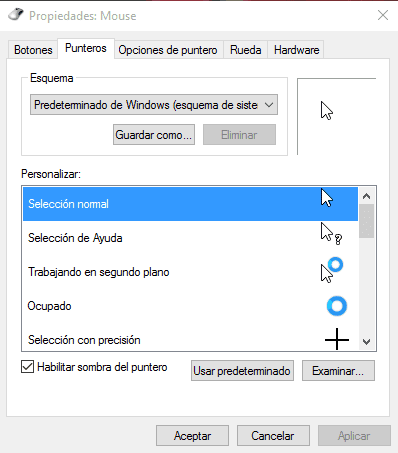
How to change the mouse pointer in Windows 10
Through this window we will be able to make all the changes that we deem appropriate to adapt the mouse pointer to our liking.
At the top we will see the section “Scheme” which includes a drop-down list through which we can access several pre-configured schemes with an organization of pointers perfectly adapted for each occasion. It should be noted that in the event that we have installed a pointer pack for Windows 10, it should appear here.
The only thing we have to do is select the one we like the most and in principle we will be done. However, there is also the possibility that there is a certain scheme that attracts us but we find that some of the specific pointers that appear at certain times do not fully convince us. If this happens we can see that just below is the section “Customize now", through which we will only have to select the pointer that we want to modify and then through the button "Examine…"We will look for the one that best suits our tastes.
As a last option we have the possibility of enable or disable pointer shadow. If our computer is powerful enough, we recommend that you enable it since it gives it a more aesthetic touch, but if you have performance problems you can choose to disable the shadow so that you will save minimally in this sense since in reality and since it is only something aesthetic You may not have any special interest in maintaining it.
Once the change or changes have been made, all we have to do is click on “Accept” and you will have already learned how to configure the mouse pointer in Windows 10.
Industrial Engineering student and lover of writing and technology, for several years I have participated in various pages with the aim of always keeping myself informed of the latest trends and contributing my grain of sand in this immense dissemination network that we know as the Internet.
 – Access to Wi-Fi settings")


