
Word Online It is the Internet version of the Microsoft Office office suite, with the particularity that we will be able to take advantage of it completely free of charge. Therefore, we are going to learn about some of the main functionalities that we are going to have at our disposal, to everything we need to be able to enjoy Word Online for free.
Article Content
What is Microsoft Word
First of all, it is very important that we understand the tool we are dealing with.
An office suite is basically a set or package of programs through which you can carry out everyday tasks in any type of office.
Specifically, the online Word tool is a more simplified version of the paid Microsoft Office Word program, so that we will have most of the functions at our disposal without the need to pay for the program.
Obviously, all this is completely legitimate, and specifically we are talking about an essential program not only for work, but also for studies and for daily life in our home, since it is the most used tool for writing documents and texts.
That said, we are going to get to know a little better everything that we have at our disposal and that you will be able to exploit freely without paying a single cent.
The advantages and disadvantages of using Office
It is important to keep in mind that using the Office Online package offers you a series of advantages that are important to highlight with respect to acquiring the license for our team, although it also presents some drawbacks that it is important for us to be clear about.
The advantages of Office Online
First of all, we are going to highlight the advantages of this system with respect to purchasing the license:
- We can use all Microsoft Office tools completely free of charge.
- It doesn't matter which computer we work from, since we can always access our files and our Office tools over the Internet.
- We can create files anywhere in the world and with any type of device, as well as share them.
- We will always carry our files with us without the need to carry a memory stick or another device, since just by having an Internet connection we can access them, which gives us more security and greater versatility.
- We will never forget any important document at home.
- We avoid the risk of our memory stick or hard drive breaking and losing important documents.
- We are protected against the loss of the pendrive or hard drive, preventing the files from being accessible in this way by third parties.
- We can work in real time with other users on the same document.
The drawbacks of Office Online
But of course we don't want you to be deceived, so we are also going to list some of the main drawbacks that we will have if we choose this option instead of paying for the license:
- All the programs included in the package are limited compared to the paid version.
- We need to have an Internet connection whenever we want to work with any of these programs.
- The documents are managed through OneDrive, which means that there is more risk of access by third parties than if we have it on our own storage device.
- The workspace is somewhat smaller, since we run the program in the browser, so the top bar is quite visible. In any case, we can solve this by changing the views or by pressing the F11 key.
- In the online version we will not be able to use the Ctrl + mouse wheel combination to modify the zoom of the document, since it is true that its size is changed, but it also changes the size of the buttons and top accesses as well as of the side panels, taking up a lot of space. It is a place we can use the zoom buttons that the program itself has.
Basically these are the aspects that we must take into account whether or not we are interested in paying for a license.
What other free Office programs do I have at my disposal?

Before explaining the process to access and start using Word, it is important that you understand that, in the same tutorial, we will automatically have access to all other Office products or programs.
This means that we will have access to:
- Contacts agenda: This is a contact book that is directly linked to our Outlook.com account. In it we can save all our contacts, including a series of data such as name and surname, email address, telephone number, where you work, home and company address, website, birthdays and anniversaries, if you have a partner, and we can even add personal notes among many others.
- Microsoft Calendar: The calendar is another essential resource today, since it is basically a complete agenda that we can organize in such a way that we will activate notices and, at all times, we will be able to keep all our appointments and chores well organized. In addition, we can create several calendars to differentiate studies from work, leisure, family, etc.
- Excel: It is a magnificent spreadsheet with which we will be able to work in a very simple way and with a large amount of resources both for working, studying or even managing our home.
- Online Forms: With this application we will have the possibility of creating all types of surveys and questionnaires in the fastest and easiest way, as well as free.
- OneDrive: This is the cloud storage system with which we will obtain, completely free of charge, a total of 5 GB of storage for all our files, emails and information in general.
- OneNote: It is a very comfortable manager through which we will be able to create tabs and different sections as well as make use of its visual style to organize any type of idea, work, project, etc.
- Outlook: This is Microsoft email, that is, what was previously known as Hotmail.
- PowerPoint Online: a fantastic tool with which we will be able to create our own presentations for work, home or even for studies.
- Skype or Whatsapp: the quintessential tool to communicate with people from anywhere in the world completely free of charge, either through chat, with the possibility of sending all types of files, links, etc., or even through a free call or video call.
- Sway: This is an application for mobile devices that allows us to present our ideas to carry out everything from projects to all types of presentations.
- Word: This is the program we are mainly dealing with on this occasion, and we would not have a complete package if we do not have this office tool necessary to create all types of documents with a multitude of functionalities.
What do I need to have access to Word Online
The only thing we will need to have access to Word Online will be the following:
- Outlook or Hotmail account: If you do not have a Hotmail account, we advise you to take a look at this tutorial to create an Outlook account or Hotmail account, if you have it, the only thing you will need is the access data.
- Internet connection: It is also very important to have an Internet connection, since it is an online product, so we will work through the Internet at all times.
How to log in to Word
Once we have everything necessary that we have indicated in the previous section, we will have to follow these steps in order to log in to Word Online:
- First, let's access the Microsoft home page for Outlook.
- We enter our email address, the phone number that we have linked to our account if we have done so, or ours is Skype. We click on “Next".
- We write our password, so all we have to do is click on “Log In” and we will be able to enter the Office Online platform.
- Right now you will be seeing something similar to this:
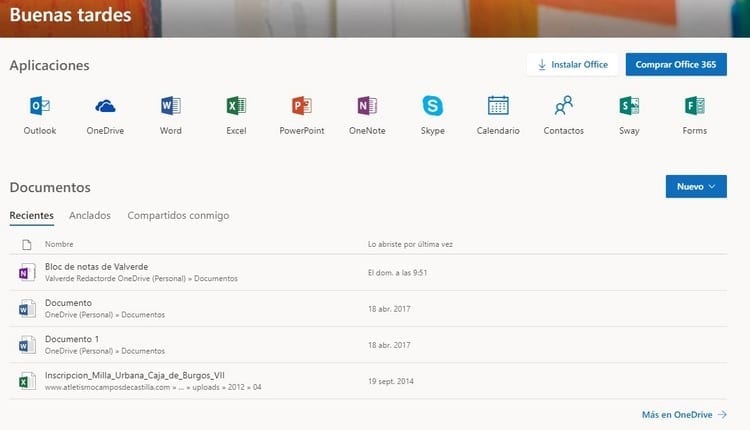
- At the top you will see that you have all the available applications that we have mentioned before, that is, all the Office Online applications.
- In our case we are going to click on the button “Word” as you can see in the following image:

- The first thing that will appear will be a window similar to the one that opens when we enter Word for PC, that is, the different pre-configurations of templates that we can choose, among which we find, first of all, “New blank document".
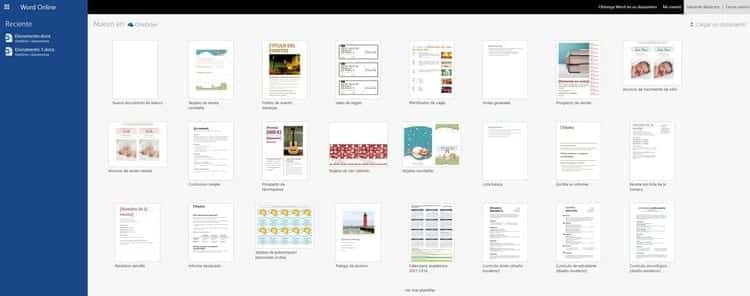
- This will be the one we use most frequently, but we can open any of them.
The main features of Word Online
Once we have opened our first template, we will notice that at the top we see the usual tabs through which we can access all the options and functions of Word Online.
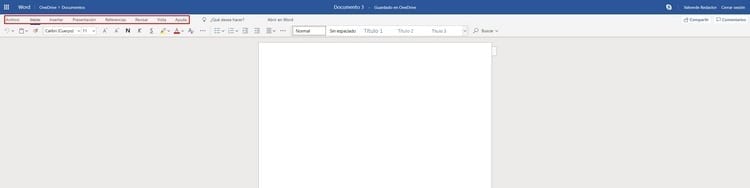
Basically we only have to move through these menus where we can find all the available options.
Obviously, as we told you at the beginning, we are going to find fewer functionalities than in the case of Word for desktop, but in any case, here it appears in all the most common utility options, so that in many cases we will not miss too many things.
Specifically, these are the tabs that we have available:
Word File Tab
If we click on the File tab, something similar to this will appear:
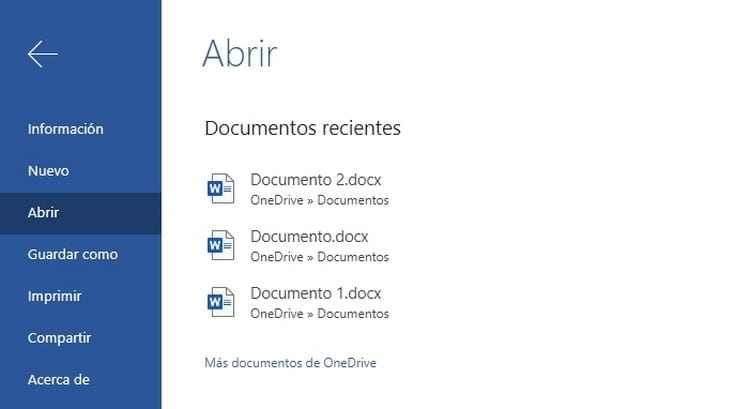
As we can see, all the documents that we have recently opened appear here, as well as a series of options that are directly related to document management, highlighting the following:
- Information: In this section, we will have the possibility of finding information related to the document that we have open at that very moment.
- New: This will be the option we will choose if we want to create a new document. Remember that this will take us to the window where we have the different templates from which we can choose, or even create a blank document.
- Open: we will access here when we want to open some of the documents that we have saved.
- Save as: With this option we will have the possibility to choose the place where we want to save the document that is currently open, as well as the name we want to assign to it, format and other options.
- Print: If we want to print the document that we have open, we must access this button. Inside we will have the different options that we can choose when configuring printing and even the printer we want to work with.
- Share: is the section through which we will be able to share the open document with any other user, so that we will even have the possibility of working simultaneously with several people on the same document.
- About: Finally, here we will be able to learn everything related to the version of Word Online that we have at our disposal.
Home tab
For its part, the home tab offers us the following menu:
![]()
This is a quick definition of the different functions that we are going to have at our disposal:
- Undo- This is an option through which we can undo the last changes we have made to the document.
- Clipboard: this would be the “buttonTake", that is, the one that would allow us to paste the content that has been stored on the clipboard.
- Copy format: with this button we copy what we have selected so that it goes to the clipboard, and in this way we can later paste it anywhere else.
- Source name: we choose the font we want to use in the document.
- Font size: Through this drop-down list, we will have the possibility to select the font size we want to use.
- Increase font size: It is a button with which we will be able to increase the font size without having to use the previous drop-down menu.
- Reduce font size: and in this case, we can reduce the font size without the need to use the drop-down menu to choose the specific size.
- Bold: allows us to activate bold in the text.
- Italics: allows us to activate italics in the text.
- Underlined: allows us to activate the underlining in the text.
- Highlight: This function will allow us to underline a specific text as if we were doing it with a fluorescent marker. By clicking on the small tab that appears on the right, we will be able to choose the underline color we want to use.
- Font Color: This section will allow us to choose what color we want to use in a specific part of the text. Likewise, we will have the possibility to choose between several colors by clicking on the arrow on the right.
- Clear format: with this button we will be able to delete the formatting of a specific part of the text that we have selected automatically, that is, we can put the text with its default characteristics without having to remove each formatting one by one.
- More font options: we have more options when it comes to managing the font, such as the possibility of crossing out the text or even adding a subscript or superscript, essential functions especially if we write mathematical or scientific texts in general.
- Bullets: Vignettes can also be created, whether personalized or by choosing any of the ones that appear in the library. Remember that you also have lists with several levels at your disposal that you can configure to your liking.
- Numeration: In the same way that we can use bullets, we can also use numbering and of course also select several levels if necessary.
- Decrease indentation: This button allows us to decrease the indentation once for each press.
- increase indent: and this allows us to increase the indentation once for each click.
- text alignment: We also have the possibility to choose the alignment we want for the text, whether it has been centered, left-aligned, right-aligned or justified.
- More paragraph options: we have other additional options for paragraphs such as choosing the distance between lines, that is, configuring the line spacing, in addition to choosing a special indentation, if we want to write the text from left to right or from right to left, and We can even access a menu through which to manage the options of a specific paragraph.
- Styles- As with the paid version, we have the option to choose between different styles for our text or for a particular paragraph. Remember that by clicking on the arrow on the right side, the menu will expand so you will have access to many more paragraphs. Likewise, you also have two options that will allow you to apply styles or even delete formatting, we did with a button that we have listed a little above.
- Search: with this option we will have the possibility of searching for content in the entire text, or even, if you look closely, you also have the Replace option that will allow you to choose the text to change and the text with which you want to carry out the modification, sewing in this way that everything can be changed with just one click. In any case, this option will open a navigation panel on the left where we will have the opportunity to select what we want.
Insert tab
This is what we will see when we click on the Insert tab:
![]()
If you want to know what each of these engines is for, we explain it below:
- Page break: with this button we can choose if we want the page break to appear.
- Panel: with this button we will have the possibility of creating a table. On the right side we have an arrow that, when clicked on, more options will appear, such as customizing the table through a menu.
- Image: This button is the one that will allow us to access a menu through which we can select the image that we want to insert into our document. We can choose if we want to search for the image through the Bing search engine, if we want to extract it directly from the computer we are working on, or even if we want to use an image that we have uploaded to OneDrive.
- Link: If we want to include a link, that is, a link so that clicking on it opens a specific web page, a file, a folder, etc., this will be the button you will have to use.
- New comment: allows you to add comments throughout the document.
- Header and footer: is the section through which we can configure both the header and the footer.
- Page numbers: this section will be the one that allows us to add or delete the page numbers, in addition to of course we will also have the possibility of choosing if we want to place it at the top or bottom, and in both cases, if we want it to appear on the left , in the center or on the right.
- Symbol: We have at our disposal a complete gallery of symbols to choose from. If we click on this button, some of the most used will automatically appear, but right at the bottom, we will see that we can also access another option called “More symbols...” which will open a window in which we will have access to the entire complete collection.
- Emoji: It would be an option like the previous one, but instead of symbols it allows us to embed emoticons in the document.
- Accessories: By clicking on this button, we will have the possibility of accessing the plugins section, either to use the ones we have added, or to add new ones to improve the functions of our version of Office Word Online. We advise you to take a look at the different options that you have at your disposal, since there are some improvements that we are convinced will help you a lot.
Presentation tab
It is also important that we know the Presentation tab which contains the following:
![]()
It is important that you know what each of the functions will be used for:
- Margins: here we can choose the type of image that we want to place in the specific document that we have open. We can choose the normal, narrow, moderate, wide margin, the default value that was used in the Office 2003 version, or we can even customize our own margin.
- Orientation: This button is the one that will allow us to modify the orientation of the sheet, that is, if we want to place the sheet horizontally or vertically.
- Size: We also have the possibility of choosing the size of the sheet, which by default will be configured at A4, but we can also choose A5, letter size, legal, executive or of course we can customize our own size.
- left indentation: allows us to make an indentation from the left and indicate the centimeters we want it to move.
- right indentation: allows us to make an indentation from the right, indicating the centimeters we want it to move.
- Spacing before: allows us to add spacing before the paragraph and indicate the space we want to cover.
- Spacing after: allows us to add a spacing after the paragraph to indicate the space we want to cover.
- More options: Through this button, we will access a new section where we have the possibility of making other configurations related to the paragraphs so that we can do everything in a more specific way.
References Tab
In the References tab we will have the possibility of carrying out the following configurations:

We explain everything you need to know about the functions of this tab below:
- Table of Contents: essential if we want to create a table of contents to be able to access the information in a much more comfortable and precise way. From here we can make any necessary corrections.
- Insert footnote: This option will offer us the possibility of creating a footnote, so that we can enter the references in an elegant and, above all, very professional way.
- Insert note at the end: In the event that we want to insert a note at the end, this is the perfect tool to do so, achieving a good link with the entire text.
- Smart search: It is a search engine that will not only allow us to know the meaning of a word, but we will also obtain links through which we can access relevant sites such as the Royal Academy of the Spanish Language, Wikipedia, etc.
Review tab
It is also important to know the Review tab, since it is ideal to be able to make a quick and effective correction of the document:
![]()
In order to get the most out of it, we show you all the review functions that you have at your disposal:
- Spelling and grammar: This is one of the essential sections if we want to deliver a job or project without grammatical or spelling errors. This is a reviewer who acted very quickly and allowed us to accept or decline proposed changes based on what was written. It works very well, plus it also gives us access to other sections such as a block with which we can modify the autocorrect options or even change the review language.
- Word count: a good text program must also have a good word count system, and on this occasion, we have the possibility of choosing whether or not the count appears at the bottom, in the same way that we can also ask it to indicate the reading time, as well as perform a word count with just one click.
- Check accessibility: Today, society is very concerned about making things easier for disabled people who have some type of disability, and in this sense, when we are preparing a document, above all we must remember those users who have visual disabilities. Through this button we will carry out a quick analysis thanks to which we will analyze whether there are accessibility errors in the document, thus ensuring that it is adequately adapted to anyone who is going to read it. It should be noted that on the right side a panel will open where it will indicate all the details that we must evaluate.
- New comment: with this button we will have the possibility of adding a new comment that will appear in the exact place where we want to save this reminder, either during the preparation of the document, to add information, or even if we want to draw attention to certain specific aspects.
- Delete comment: obviously, we will also have an option through which we can delete a comment that has been previously created, since for example we may have finished adding the information that we had pending, and in this way we can remove it so that the text is completely clean.
- Previous: This is a button to navigate between comments, and on this occasion this button will help us go to the previous comment of the one we are in.
- Next: It is also a button to navigate between comments, but instead of the previous comment, this time we will go to the next comment depending on the one we are in.
- Show Comments: this button opens a panel on the right side thanks to which we will have a preview of all the comments that we have added to the text, thus being able to locate in a much faster and easier way the one in which we are especially interested at one point.
- Translate: it is also very important that we know the option of Word Online translation, and to do this we only have to click on this button that will open a panel on the right side of the window with the translator, being able to choose if we want a translation of the text that we have selected, or a complete translation of the entire document. Of course, it has a system to automatically detect the language in which the original document is, and at the same time we can also choose to have said text translated into a wide collection of languages from which we can choose through the drop-down list.
View tab
The View tab contains some functionalities that can be very useful:
![]()
This is all you need to know about the functions of this tab:
- Reading view: The reading view is a very interesting option with which we will be able to manage the document in a more visible way, so that we will not have so many options around, but rather it will focus almost entirely on the text. In addition, it also has an accessibility mode that improves contrast, and to exit this view, in the section to avoid the document we simply have to say that we want to edit it in the explorer, and we will return to the previous view.
- immersive reader: another view also designed to improve reading, although in this case, it will turn our entire browser into a book, so that we will practically not have any distractions. In addition, this view mode also has a very interesting advantage, and that is that at the bottom we have the possibility of asking Word to read all the text, ideal for when we are carrying out other tasks, or even to be able to focus well on the ideas that we have reflected in the document.
- Zoom: as you already know, this button is the one that will allow us to choose the size in which we see the page, and to do this we can choose 100%, which is the default, or oscillate between 50% and 200% , and can also choose to approximate the maximum depending on the margin of the page.
- 100%: This button simply serves so that, in the event that we have modified the zoom, we can return to a 100% view by simply clicking on a button, without the need to open the zoom and select the size.
- Navigation: with this button we will open the navigation panel on the left side of the window, so that we can search for any text or even replace the texts or words that are necessary automatically by just indicating a couple of data.
- Header and footer: button thanks to which we will be able to enter both the header and the footer.
- Footnotes: essential for adding footnotes.
- Notes at the end: with this option, we will have at our disposal the possibility of adding notes at the end of the page.
- Ends of pages: This functionality will allow us to activate or deactivate the display of page ends.
- Simplified tape: pay close attention to this button, since it has quite interesting functionality, since it is the one that will allow us to configure the ribbon, that is, all these buttons and options that we are browsing. By default, the simplified ribbon is activated, but we can deactivate it so you will get a menu much more similar to the one you found in the version of Word for PC. We warn you that, if you deactivate the simplified ribbon, some new functionalities that we have not indicated in this section will also be added, since basically what happens is that all these functions are more visible, although in reality, In both ways, we have access to each and every one of them.
Word Online Help Tab
We finish with the Help tab, since through it we will have the possibility to resolve the different doubts that may arise when starting to use the program as well as taking advantage of it.

Each section you find will have different functionalities, which we detail below:
- Help: Finally we enter the last tab which is the one that will allow us to request help and resolve any type of doubt. When you click on it, on the right side a very complete menu will appear with a search engine, a section where it suggests articles to answer our questions, and even several tips that will gradually help us get to know the program better.
- Comments: The comments section is specially designed to be able to transmit our experience to the Microsoft team, specifically the one in charge of developing Word Online. Of course, here we will be able to congratulate the team for their work, to indicate what we don't like or even contribute our ideas and advice, thus being heard and, ultimately, in future developments, we achieve a better functionality.
- Accessibility: Finally, we have the accessibility section, which is basically a box where we will find some key combinations that can make our lives much easier, thus achieving everything from moving between notes or comments to improving the accessibility of the document, executing commands and a long etc.
In any case, we remind you that these are the default presentations of each and every one of the tabs that we are going to have at our disposal, but in some of them, depending on what we are working on, they may be modified, so that in Sometimes we can find some added options that can be very useful to carry out actions in a more direct or much more specific way.
In addition to all these options that we have indicated, remember that at the top and in the upper right corner, you will also have the possibility of accessing other menus and information that you may find very interesting.
How to expand the workspace in Word Online
One of the problems that we can find with the version of Word online compared to the version of word offline It is precisely the fact that the workspace is visibly reduced.
As you can see, the Word program for PC will allow us to use our full monitor, while the online version opens a browser, which means that the entire top menu and tabs will be taking up very valuable space.
If you have a large monitor, in principle you will hardly notice this, since you can also work with the views or even zoom in without any difficulty.
However, when we work with a small monitor, as happens when we do it with a laptop, then the problems increase, since we do not have as many possibilities to get a preview of how the document is looking.
In that case, there is always one thing we can do to improve this, which is simply to press the F11 key, a key that many of you will already know that what it does is hide the entire top bar of the browser and the tabs, achieving in this way make the most of the screen.
Once we have finished, by pressing the same key again, the browser will be displayed again with all the options, including the tabs that we have open.
Industrial Engineering student and lover of writing and technology, for several years I have participated in various pages with the aim of always keeping myself informed of the latest trends and contributing my grain of sand in this immense dissemination network that we know as the Internet.


